If you’ve ever questioned whether your computer’s performance could be enhanced beyond its default settings, then overclocking might be the solution you’re looking for. Follow our detailed instructions on safely overclocking your CPU to find out if your machine can handle it.
Overview Of Overclocking
Definition
Overclocking involves increasing the clock speed of a computer component above the recommended limits set by the manufacturer, to boost performance. This enables a computer to execute tasks more quickly. It is not limited to just the CPU, as you can also overclock your GPU.
How Does It Work?
By overclocking, you can operate your processor at higher clock speeds than initially planned, allowing for quicker and smoother execution of resource-intensive tasks like video or photo editing, as well as graphic card’s struggles to handle gaming. In general, overclocking improves the responsiveness of your computer.
The efficiency of your processor is determined by two main factors: the clock speed and the CPU core ratio. Overclocking increases the clock speed, which determines how many operations the CPU can carry out per second, measured in GHz. Each operation produces an electric pulse, known as a “clock signal,” that instructs the CPU’s circuits to handle data.
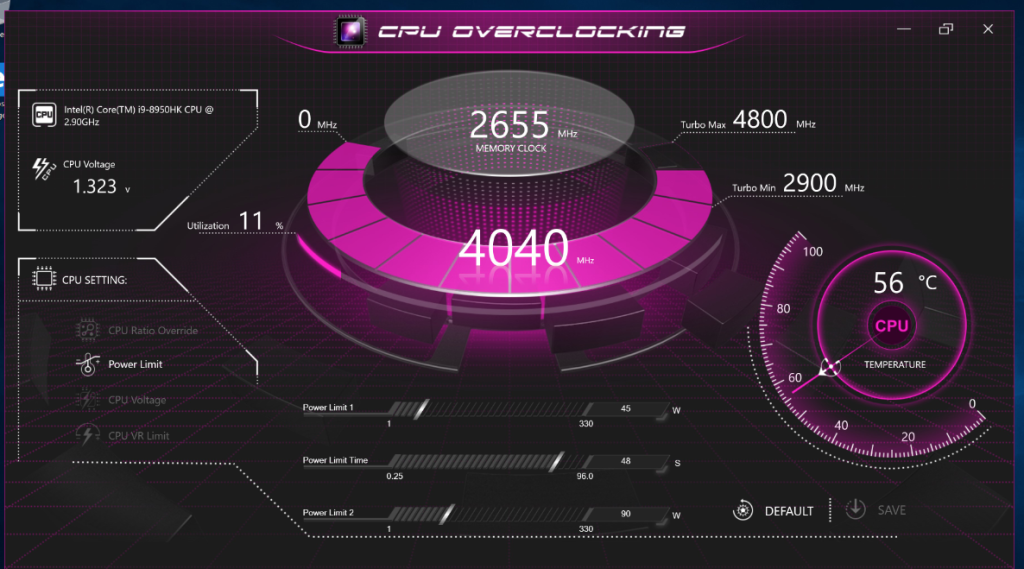
In our example, we were able to boost the clock speed from 3.6 GHz to 4.6 GHz – a significant achievement! This is the essence of overclocking.
Is It Safe To Overclock?
Today, overclocking is considered safe, as modern computers come equipped with features that will shut down or reduce power to components if they become too hot. Although overclocking involves pushing your hardware beyond its official limits, advancements in materials have made it less likely for your hardware to encounter any issues.
It is doubtful that overclocking your CPU will cause it to be damaged, or that your computer will crash completely. If the clock speed is too high, your PC will simply restart or display a desktop blue screen. To learn more, read our guide on how to assemble your gaming PC.
However, it is important to note that increasing the voltage and clock speeds of the CPU can strain it. This may shorten the CPU’s lifespan slightly, for example, using some CPU model like Intel core or AMD chip from 15-20 years to around 12-15 years, although this is difficult to predict. In any case, you are likely to upgrade your computer before the Intel CPUs lifespan is affected significantly.
Pros Of Overclocking
Overclocking is often a convenient, simple, and cost-effective way to enhance performance, particularly compared to the cost of purchasing a new CPU or computer altogether.
Increased Overall Performance
Increased overall computer performance is the primary advantage of overclocking. Whether for gaming, rendering, coding, or everyday tasks, boosting the core clock can provide a significant performance boost. Even with newer hardware, overclocking can help processes run smoother with more challenging software applications.
An aging computer is possible to overclock to be revitalized. If your older computer is struggling to keep up with demanding apps and workloads, overclocking can breathe new life into it by increasing clock speed and overall performance.
Older computers tend to see more noticeable improvements compared to newer models when overclocked. This is because older computers, which usually have less powerful components, have more potential for performance improvements. On the other hand, newer PCs already have more advanced, powerful components, which limits the extent to which overclocking can enhance performance.
Boosting Gaming Experience
Overclocking is also a great way to improve gaming performance by increasing the FPS. While many games rely heavily on the graphics card for calculations (GPU bound), the processor’s performance also plays a significant role in gaming performance.
However, you’ll need to note that while overclocking can boost frame rates in many situations, it may not be as effective if your operating system and programs are not optimized properly. In that case, you can also try to choose suitable DNS to optimize your gaming experience.
Cons Of Overclocking
Overclock a CPU is generally considered safe, but there are still other factors to consider. The following are key points to consider when deciding whether to overclock and how far to push your system.
Overheating
One of the risks associated with overclocking is the possibility of increased temperature and power consumption leading to overheating and decrease the battery’s life. Although the likelihood of this causing immediate issues is low, prolonged overheating can damage your computer and reduce the lifespan of essential components.
Instability
Overclocking may result in your PC becoming unstable, leading to system crashes and freezes. While this may not be a problem in itself, there is a slight chance of data corruption. It is crucial to back up important data and closely monitor performance when conducting benchmarks and stress tests.
Invalidated Warranty
Using overclocking as a way to modify your device can result in the warranty of your computer being invalidated. This means that if your computer malfunctions, even if it is not related to overclocking, you will no longer be able to get a replacement or refund. Make sure to review the terms and conditions set by the manufacturer before attempting to overclock your hardware.
Tutorials: How To Overclock My CPU ?
When you overclock your CPU, the goal is to enhance performance without causing damage to your hardware. It is essential to monitor your system closely to prevent any malfunctions.
Step 1: Verifying CPU Core Temperature
Before starting the overclocking process, assess your CPU’s temperature as overclocking can raise it. It is important to track the temperature change. You have the option to monitor CPU temperatures either in BIOS or by utilizing a third-party software tool.
If your computer is already experiencing overheating issues, make sure to address this before proceeding with overclocking.
Step 2: System Stress Test
If you are considering overclocking your CPU, it is important to perform a stress test on the system for several hours. It is necessary to ensure that your current system can handle the default clock speed without any issues. This will help you troubleshoot any problems that may arise in the future.
Step 3: CPU Performance Evaluation
To track improvements after overclocking, it is essential to know the baseline performance of your CPU. Utilize tools like Cinebench, Prime 95, AIDA64, or Intel BurnTest to benchmark the current CPU performance under rendering workloads.
Before attempting any overclocking, verify that your PC’s current configuration is optimized. This will ensure that you have a solid foundation to work with when you decide to overclock.
Step 4: Enter Your BIOS Settings
To effectively overclock your system, adjustments need to be made in the computer’s BIOS settings. The BIOS (also known as UEFI) holds crucial configurations for your PC.
To enter the BIOS settings, you must first turn off your computer and then restart it. While the computer is restarting, repeatedly press the DELETE, F2, or F10 keys to enter the BIOS controls. The specific key combination can vary depending on the brand and model of your computer. You may see a message such as “Press F2 to enter Setup.”
Your BIOS interface may not look exactly like the ones shown in these screenshots, but you should be able to find options like Advanced CPU Core Settings or OC/Overclocking where you can adjust CPU overclocking settings.
Step 5: Deciding Between Automatic And Manual Overclocking
Some motherboards may offer options for Automatic Overclocking or OC Level in the BIOS. These options provide a small overclocking boost at safe levels, but the results may not be significant. It is recommended to choose manual overclocking for better control and results.
Step 6: CPU Multiplier Adjustment
Using the base clock CPU frequency embedded in the motherboard (typically set at 100 MHz) — by multiplying this number, you determine your resulting clock speed. For instance, a multiplier of 36 (x100 MHz) would give you a clock rate of 3.6 GHz.
Gradually raise the multiplier, step by step, and assess the speed and stability of your computer. Begin with one core, then proceed to the others for further acceleration of your computer. Your computer should start to exhibit instability, consider tweaking the CPU voltage setting in the BIOS controls. This setting is typically at 1.25 or set to Auto as the default — try increasing it to 1.4 or 1.5.
By methodically adjusting the voltage and multipliers, you will eventually determine the maximum overclocking potential of your system. Keep in mind that increasing the CPU will result in higher operating temperatures for your computer. Therefore, ensure that you have a sufficient cooling system in place and that your computer’s hot air ventilation system is capable of handling the increased heat.
Caution: Getting a Black Screen During Overclocking
If your screen turns black after overclocking, your PC may fail to boot up. However, you can easily reset the BIOS to default settings, allowing you to try the last stable overclocking setting. Most motherboards have a button labeled “Clear CMOS” or “Reset CMOS” for this purpose.
In extreme cases, you can remove the small battery on the motherboard, wait for 10 seconds, and then reinsert it. Consult your manual for detailed instructions.

Fixing Overclocking Issues
If you are facing issues with your overclocked computer, there are steps you can take to diagnose and rectify the problems. Here are four troubleshooting steps for common overclocking issues that may arise.
Checking Device’s Stability
When trying to troubleshoot issues related to overclocking, the first step is to test the stability of the device’s components like RAM, CPU, and motherboard using benchmarking and stress-testing tools like Prime95, Cinebench, or OCCT. These tools will put your CPU under a heavy workload to identify any potential errors, crashes, or freezes, and assist in determining a reliable level of overclocking that your system can manage.
Tracking Hardware Temperatures
If you are still experiencing problems, overheating is likely the cause, so make sure to monitor the temperature of your device. Utilize software tools such as HWMonitor, Core Temp, or SpeedFan for real-time temperature monitoring. It is recommended to keep the CPU temperature within the range of 40–65°C (104–149°F) for optimal performance.
Modifying Configuration
If you are experiencing overheating or stability issues, make adjustments to the two main overclocking settings. The multiplier controls the speed of the CPU, while the voltage determines the amount of power supplied to the CPU — lowering both settings may reduce your overclocking capabilities but will also decrease the temperatures and power consumption of your components.
Keeping Drivers and BIOS Up To Date
In some instances, problems with overclocking a CPU could be related to the software on your computer. Keeping your device’s drivers and BIOS updated using programs like Avast Driver Updater can improve communication between your system, CPU, and other components, ultimately helping to prevent potential issues such as errors, crashes, or freezes and ensure the system is stable.

