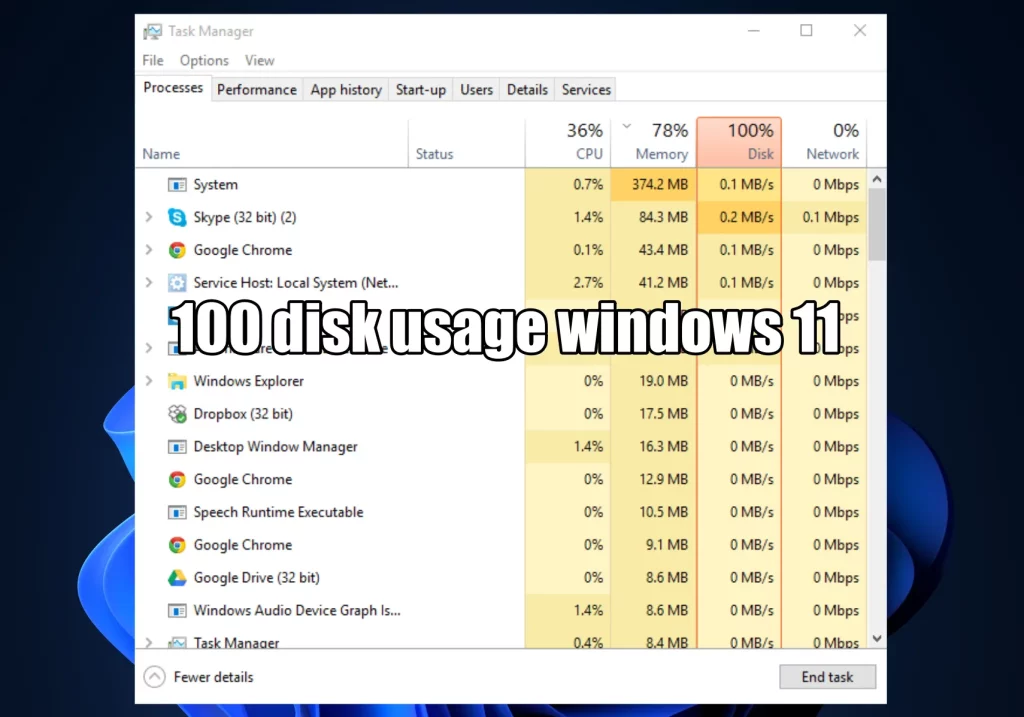
Having 100 percent disk usage in Windows 11 or 10 is an issue that plagues many computer users. A disk running at 100 indicates that your system has reached its maximum capacity for performing tasks, which can be very frustrating and difficult to troubleshoot. Fortunately, several ways exist to identify the cause of the high disk usage and resolve the issue before another upgrade version of Windows – Windows 12 coming soon. In this article, we will explore the common causes of 100 percent disk usage in Windows 11 and 10 and provide tips to help you fix it quickly and efficiently.
Why is my disk at 100 all the time on Windows 11?
Having your disk drive constantly at 100 percent capacity is a telltale sign of an issue with your computer, especially when running Windows 11, causing some problems like 99% upload speed. This problem can be caused by a few different things, such as having too many programs running in the background and not enough RAM to handle them all, having too much junk data stored on your computer, or having malware or viruses. If you notice that your disk drive is always running at 100 percent capacity, the first step should be to close any unnecessary programs or windows that might be open in the background. If this doesn’t help then you may want to look into freeing up space from your hard drive by deleting any unneeded files and cleaning up temporary files. It would help if you also scanned for any viruses or malware that might be taking up too much of your computer’s resources. Following these steps should help improve the performance of your computer and reduce the strain on your disk drive.
How to fix Windows 11 high disk usage issue?
To fix high disk usage problem on Windows 11, follow the below solutions in order:
Disable SysMain (Superfetch) Service to reduce disk usage in windows
Disabling SysMain (Superfetch) service can be beneficial in a few different ways. It helps to optimize system performance by reducing the amount of RAM and CPU resources used by the operating system. Additionally, it can help reduce boot time and improve overall system responsiveness. However, this should only be done if you are sure that you won’t need the service in the near future. Although disabling SysMain (Superfetch) service may have some advantages when it comes to optimizing performance, it is not recommended for general users as it may cause instability issues with certain applications or games that rely heavily on prefetching for optimal performance.
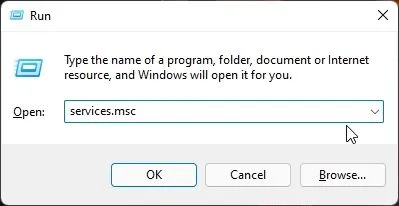
Step 1: To open the Run prompt, press the keyboard shortcut “Windows + R” on Windows 11. Then, type services.msc and press Enter.
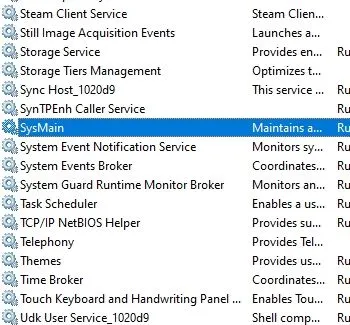
Step 2: Look for “SysMain” or “Superfetch” service. Double click to open its setting window.
Step 3: In the properties window, select the Startup type to “Disabled” and click on “Stop” button to immediately stop the service. Then, click on Apply -> OK.
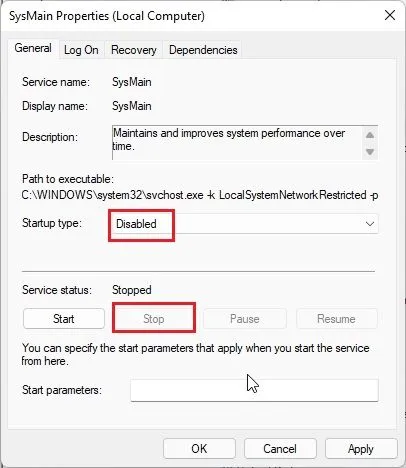
You will instantly see that the Disk usage is reduced to around 15-20% usage on your windows 11 PC. Restart your computer and observe its performance to make sure that disk usage remains low.
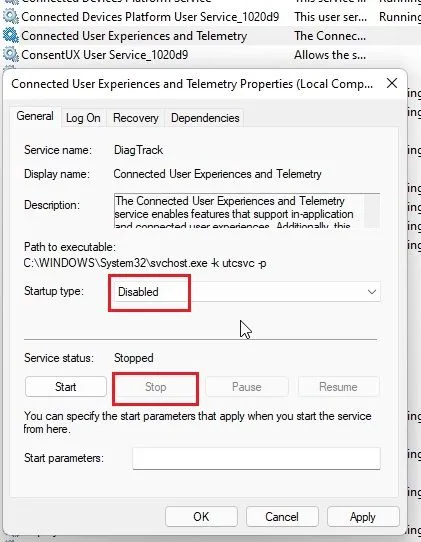
Disable Connected User Experiences and Telemetry
Windows services might collect information about their system usage or send it back to Microsoft. Disabling these services can prevent Microsoft from collecting data related to which apps you use, how often you use them, what websites you visit, and the performance of your computer. Additionally, disabling this feature will improve system performance as it prevents unnecessary background processes from running. Although disabling this feature may reduce the number of personalized experiences available, it ultimately increases privacy and system performance.
Step 1: To open the Run prompt, press the keyboard shortcut “Windows + R” on Windows 11. Here, type services.msc and press Enter.
Step 2: Look for “Connected User Experiences and Telemetry” in the Services window and double-click it. Change the Startup type to “Disabled” then stop the service immediately. Click Apply -> OK to save the changes.
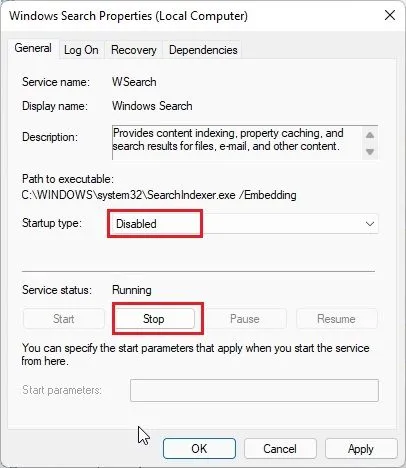
Disable Windows Search Service
Windows Search may be responsible for the high disk usage in Windows 11. Turning off Windows Search should solve the problem for many people, but it should be noted that this will also impact being able to search files and folders on your computer. If you are not comfortably deactivating this service, we recommend skipping this solution and moving on to the next step.
Step: 1. Again, use the “Windows + R” keyboard shortcut to open Run prompt and execute services.msc command.
Step 2: Next, look for “Windows Search” and double-click to open it. In the new properties window, switch Startup type to “Disabled” and click stop the service. Afterward, select Apply -> OK and restart the PC. You should notice lower disk usage on your Windows 11 after the reboot.
Disable Startup Apps
Windows 11 allows users to disable startup apps, helping to optimize the start-up process. This is especially useful for those who have many applications automatically launching at startup and slowing down their computer. Disabling these programs can free up memory and CPU resources, allowing faster boot time. Additionally, if users find that they are no longer using certain applications, disabling them from the startup list can help keep their system clean and clutter-free.
1. Press Windows key + I to open Settings.
2. Select Apps from the navigation, then click Startup.
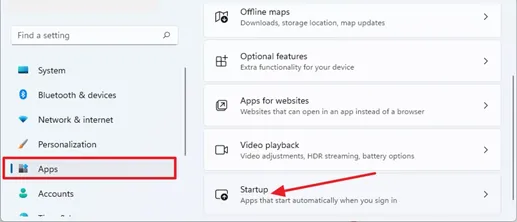
3. Toggle Off as many non-Microsoft start-up programs as possible.
Disable Windows Update service that may cause high disk usage
Windows Update service helps the user to keep their operating system up-to-date with the latest security patches, bug fixes, and driver updates. It also helps to improve the performance and stability of the system. However, users may want to disable Windows Update in order to free up more resources on their hard disk or to reduce system load. It should be noted that disabling Windows Update is not recommended unless absolutely necessary, as it could potentially have an adverse effect on your system’s security and stability. Check how to do it below.
- Press Windows + R, type services.msc in Run prompt popup, then press Enter.
- In the services list panel, find Windows Update service. Double-click Windows Update service to open the properties window.
- In General tab, select Disabled option in Startup type.
- Click Apply -> OK to apply the changes. This way will permanently disable the windows automatic updates service.
Increase Virtual Memory to reduce the disk usage
Virtual memory is a feature of Windows that enables a computer to extend its RAM capability beyond the physical limitations of the hardware by using a portion of the hard disk drive as additional space. By resetting virtual memory, you can help improve your computer’s performance and ensure it runs optimally.
To reset virtual memory in Windows 11:
- Press the Windows + R keys to open the Run prompt popup.
- In the command box, type SystemPropertiesAdvanced and click OK.
- From there, select Advanced tab, click Performance Settings, and then select Adjust for best performance.
- Finally, select Change under Virtual Memory, uncheck Automatically manage paging file size for all drives and then enter Custom Size. You can then set the Initial Size and Maximum Size as you prefer before clicking OK.
- After pressing OK to reboot. Your computer will now have its virtual memory reset with improved performance!
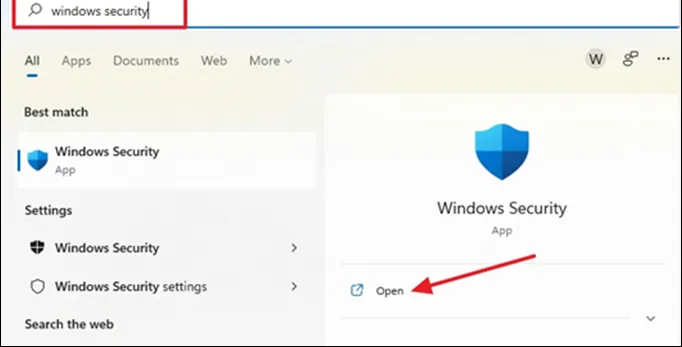
Perform a Microsoft Defender full virus scan on windows 11
In Windows 11, Microsoft Defender Antivirus is constantly running in the background to detect and delete a wide range of malicious software, like viruses, ransomware, spyware, rootkits, and more. Additionally, this security feature can guard the device against cyber criminals and other dangers. Even so, it is still recommended to perform a full virus check manually to make sure that nothing suspicious is infecting Windows 11.
To perform a full virus scan, follow these steps:
- Open Start.
- Search the Windows Security app and click the resulting app to open it.
- Choose Virus & threat protection.
- In the “Current threats” section, choose Scan options.
- Choose Full scan option to scan the entire system.
- Press the Scan now button.
Once you finish the process, Microsoft Defender Antivirus will look over the computer for viruses and other malicious software. If anything is detected, the Microsoft Defender will automatically delete (or quarantine) the dangers.
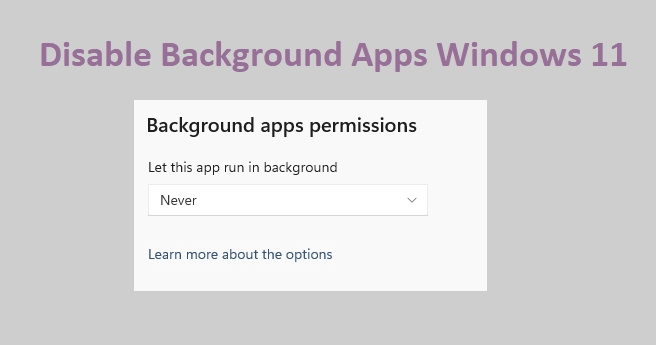
Disable Background Apps that use much disk usage
Windows 11 allows users to disable background apps from running. This feature can help improve the performance of computer systems by reducing the amount of memory and hard disk usage. Additionally, this feature gives users more control over which applications they want running in the background and which ones they don’t. Ultimately, disabling background apps is a great way to optimize system resources and keep unwanted programs from taking up valuable space on your hard disk.
Follow these steps to disable background apps:
- Press Win + I to open the Settings window.
- Click on the Apps tab in left pane.
- Choose Apps and Features in the right pane.
- Find the app that you want to modify the background permission for.
- Click the three-dots icon next to the app name and press Advanced options.
- Go to the Background Apps Permissions part.
- Select the drop-down for Let this app run in the background and pick Never. This should prevent the app from running under the background.
Check Disk to fix the problems
The next solution for dealing with a 100% disk usage problem in Windows, is to check the hard drive for errors and repair them, using the CHKDSK command.
1. Open the Command prompt as administrator permission
2. In the command prompt, type “chkdsk c: /x /r” and press Enter.
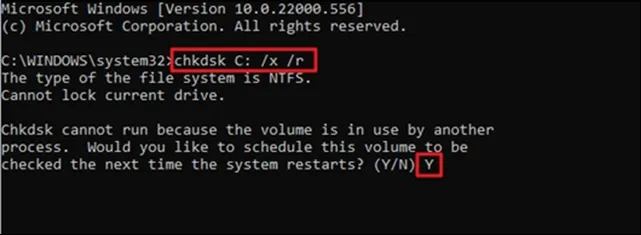
3. You will be prompted to set up a disc scan the next time the system restarts. Press Y (to confirm Yes) and reboot your device to scan and repair the disk issues.
4. When you start up Windows again, allow Windows to finish the check and repair process. Once you have logged into the system, open Task Manager and inspect if the high disk usage problem remains.
Update Windows 11 computer
If none of the above approaches work for you, and your PC is still unresponsive due to high disk usage, you should try updating Windows 11 to the latest version. By pressing the “Windows + I” shortcut, which will open Windows Settings, shift to “Windows Update” from the left menu, and click on “Check for Updates” in the right pane.
Install all the pending updates and reboot your computer. Subsequently, inspect whether the 100% disk usage problem has been fixed or not.
Update Storage Drivers (Replace HDD with an SSD)
The ultimate way to resolve the 100% disk usage problem in Windows 11 is to replace your hard drive (HDD) with a solid-state drive (SSD). This solution is one of the most effective methods to improve the speed of your computer significantly.